Creating workflows
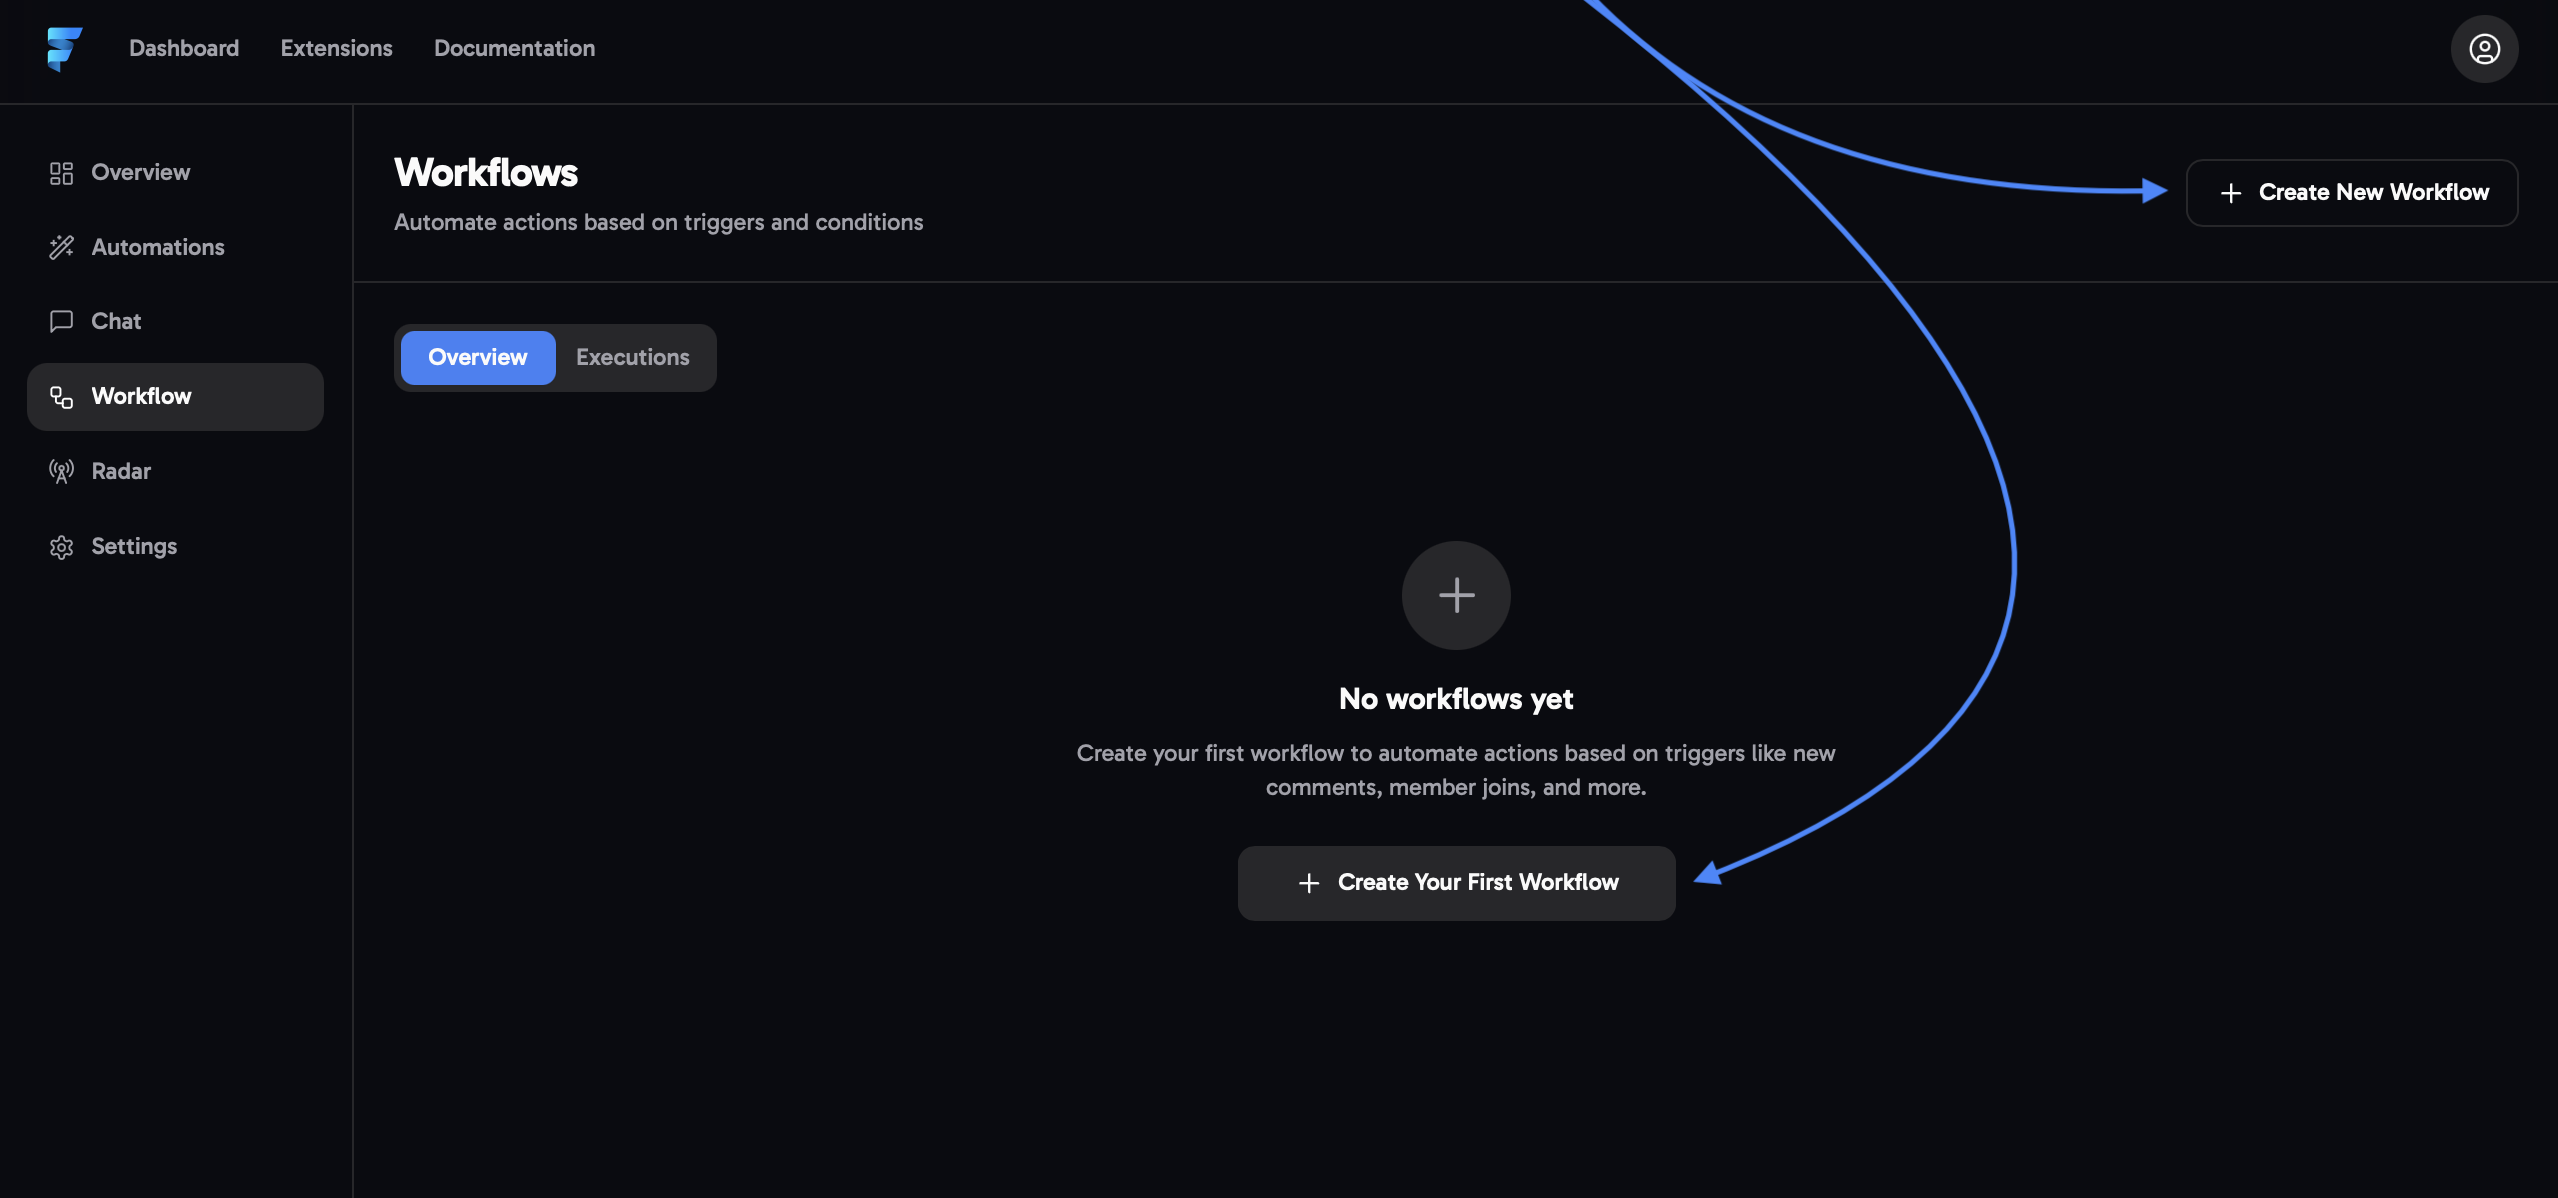
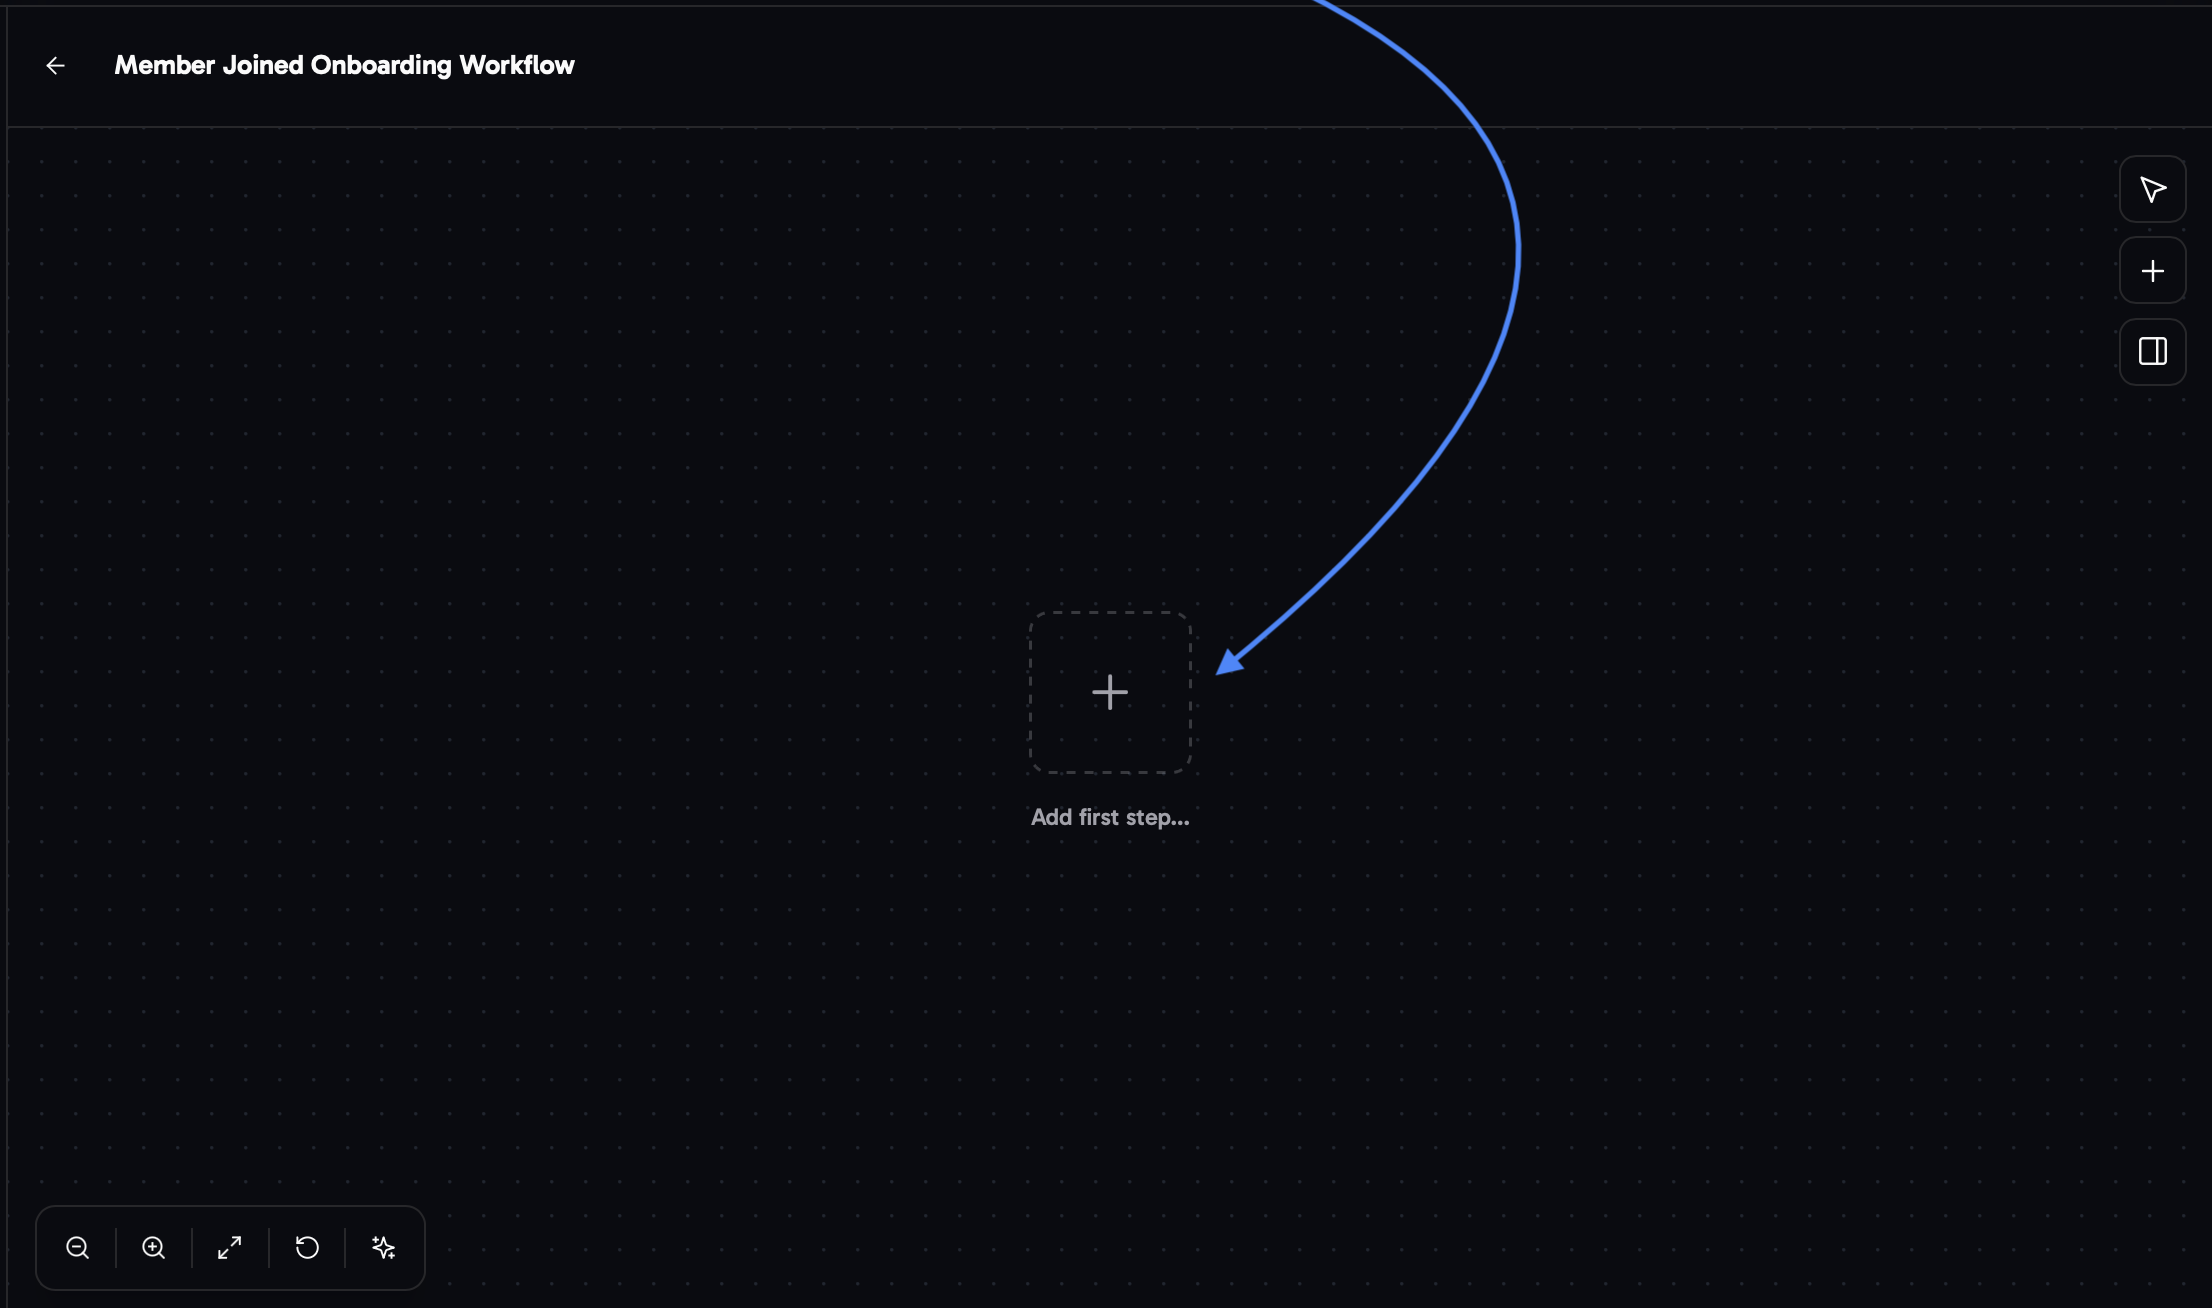
Below, you’ll find a beginner’s guide on how to set up your first workflow.Go to the Workflow tab and click “Create Your First Workflow” in the center of the screen.
Choose from four different trigger options as the starting point for your workflow
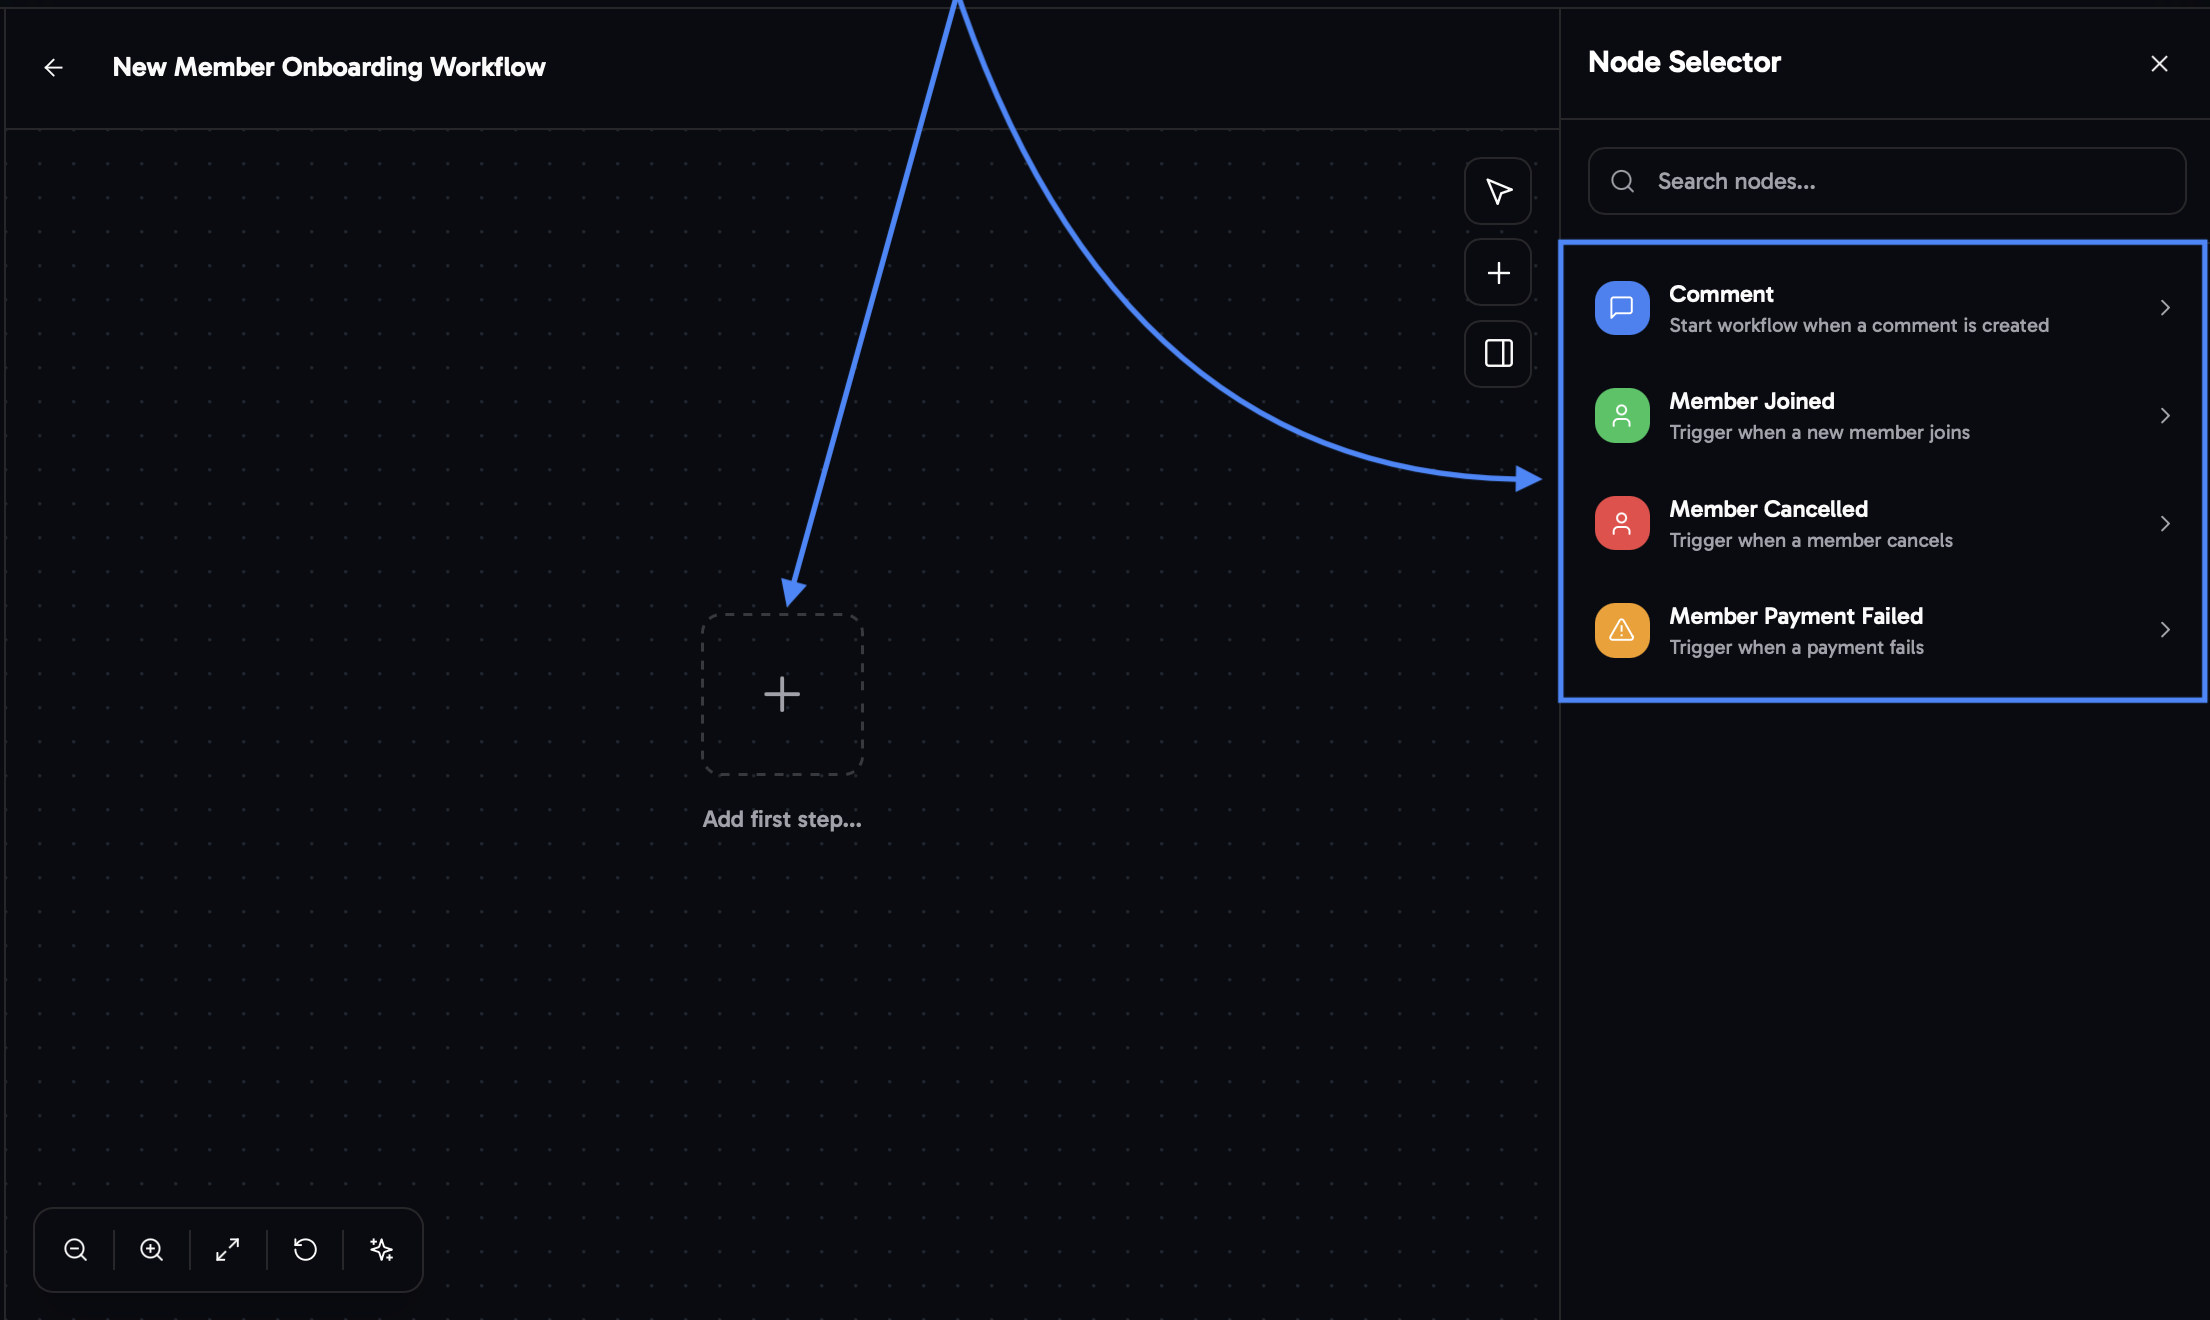
Here are the different options and their main use cases and benefits:
Comment - CTA
Member Joined
Member Cancelled
Member Payment Failed

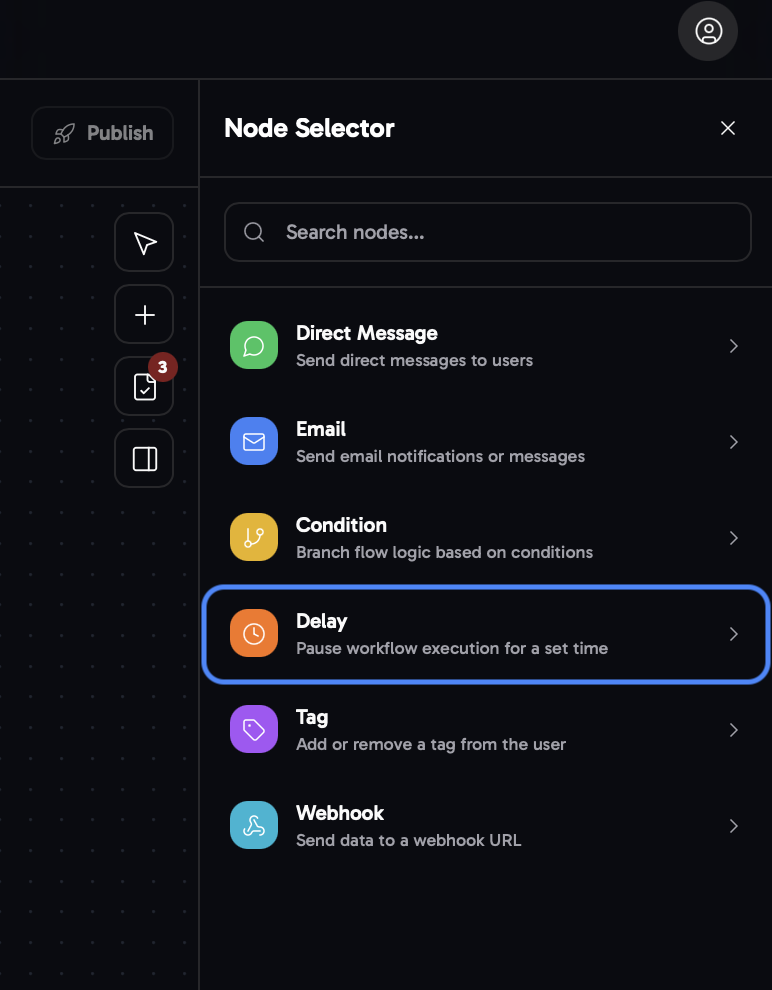
Select from Six Different Nodes and Learn How to Set Up Each one:
if you want to directly learn how to set up complete workflows head here
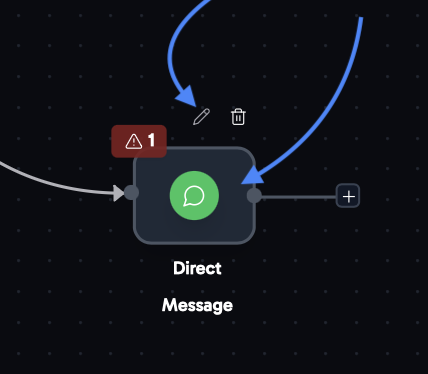
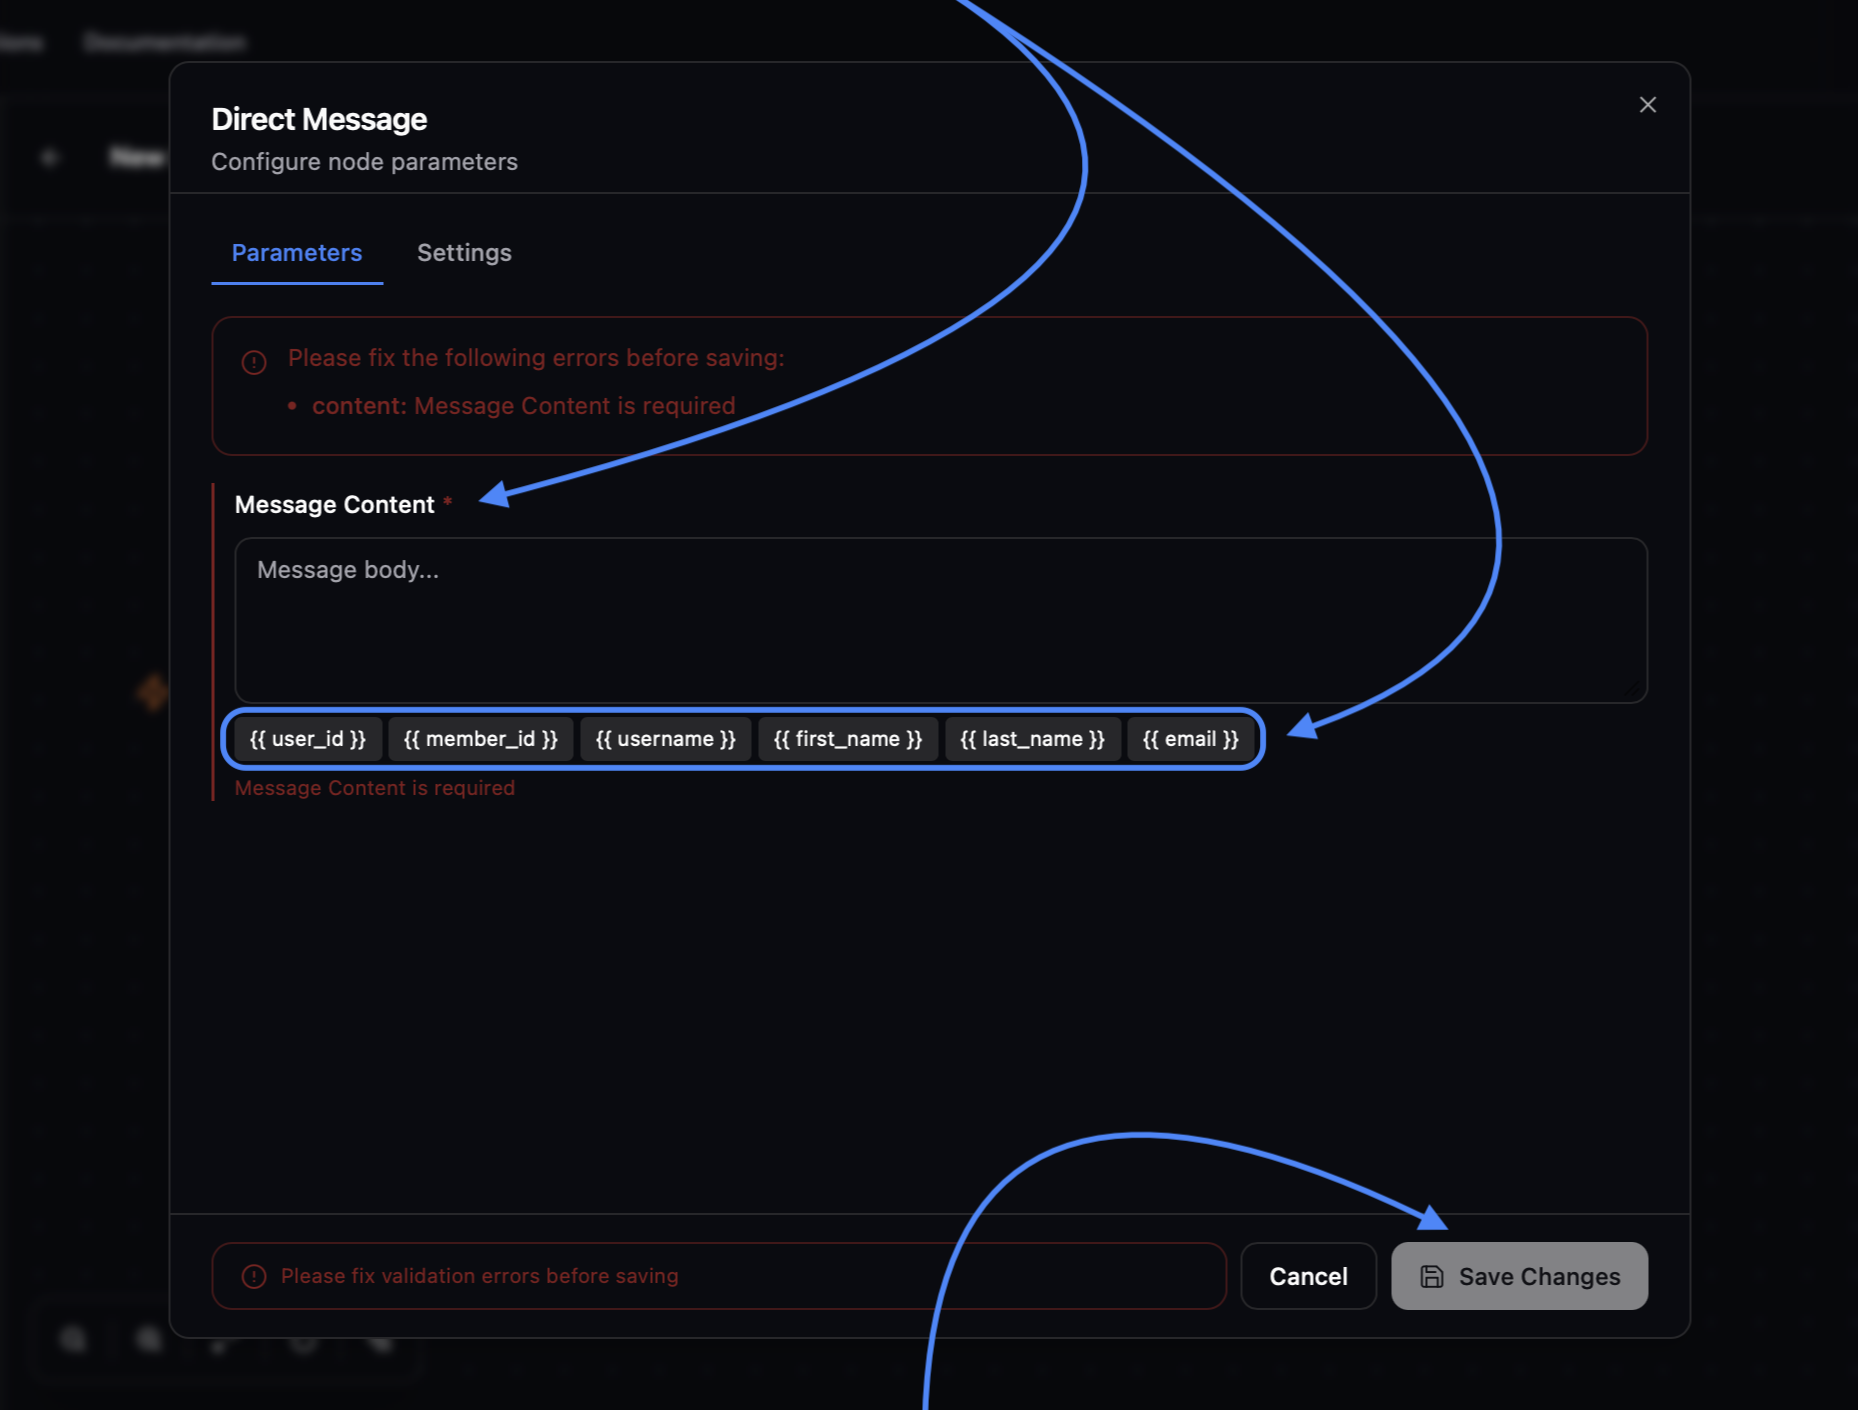
Direct Message Node
Direct Message Node
Select the Direct message Node

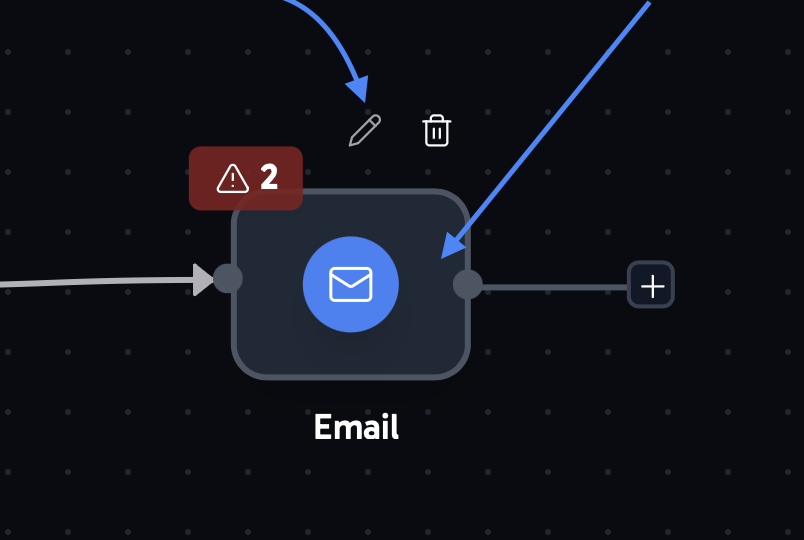
Email Node
Email Node
Select the Email Node


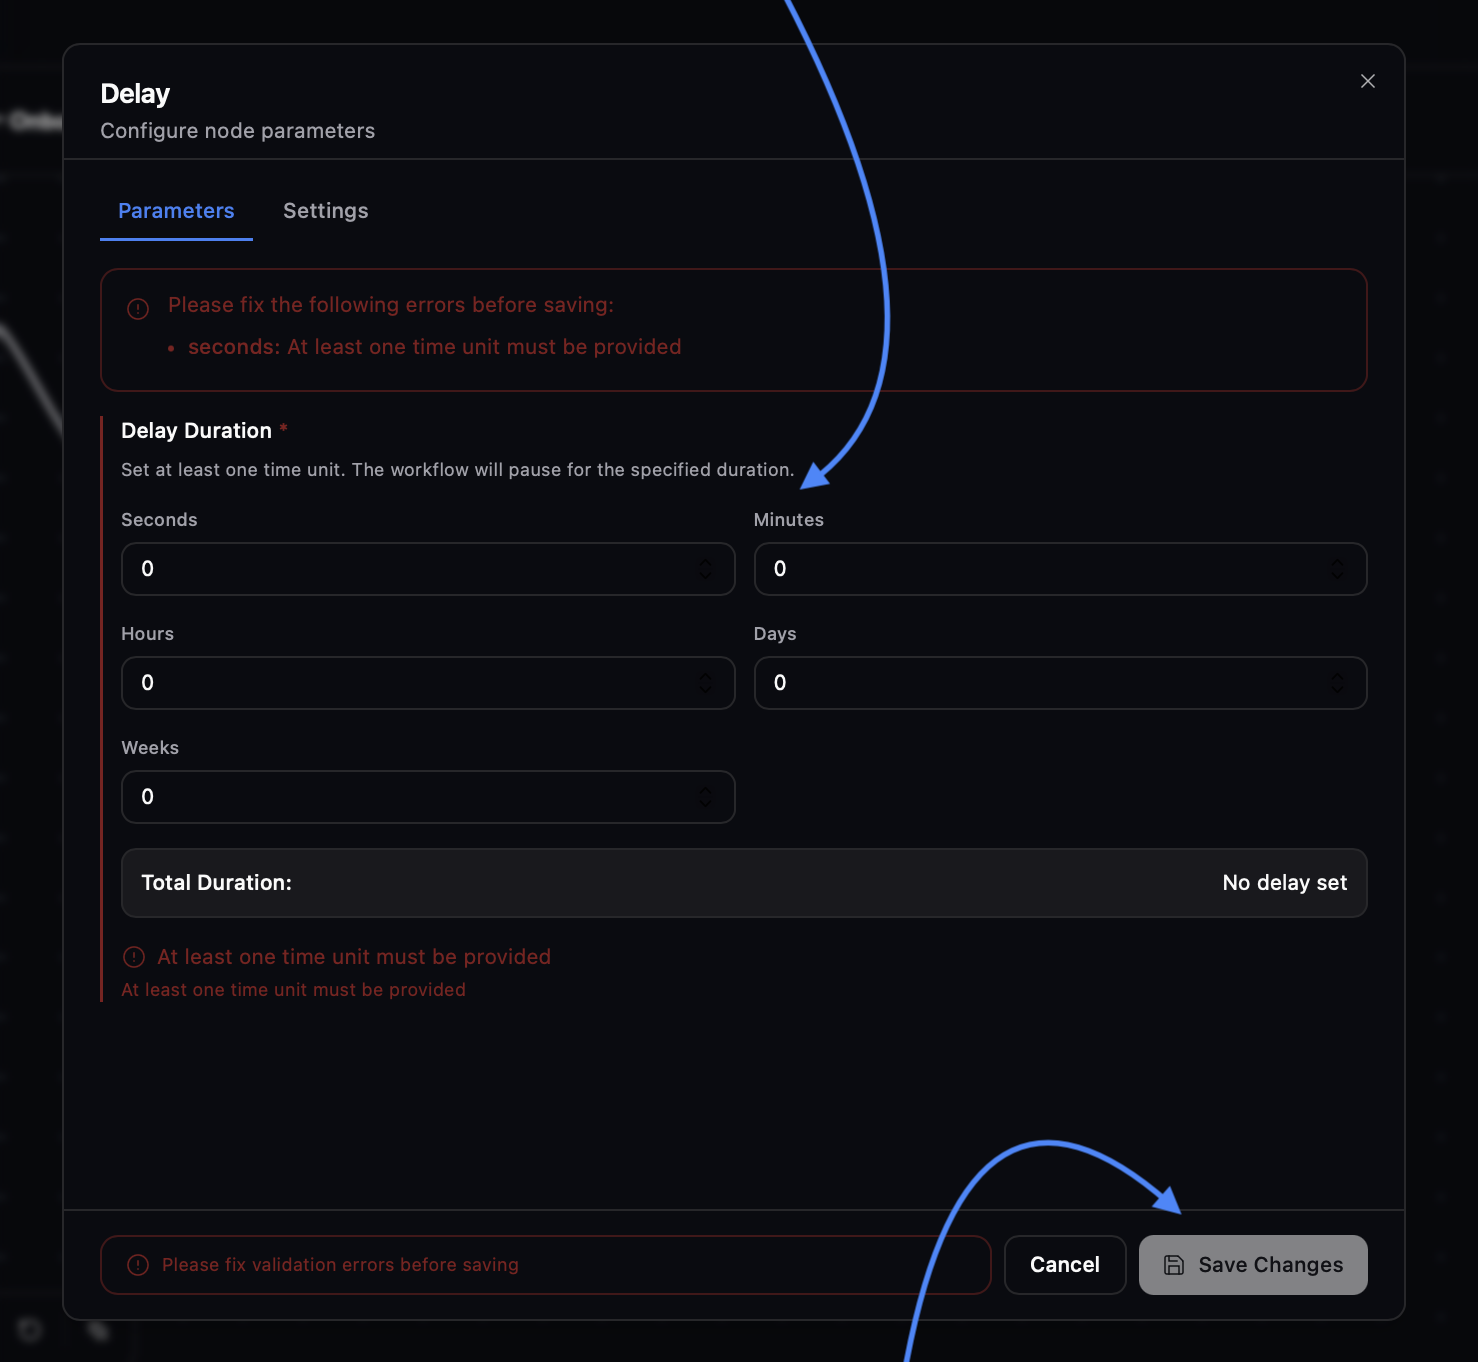
Delay Node
Delay Node
Select the Delay Node


Condition Node
Condition Node
This node lets you track message status, monitor folders and tags, check replies, detect keywords under posts, and more. It helps you target specific groups more accurately and improve the overall customer experience driving more sales.

The "advanced" section in the top right gives you additional flexibility for building workflows, but it is more complex & best suited for users with technical experience.


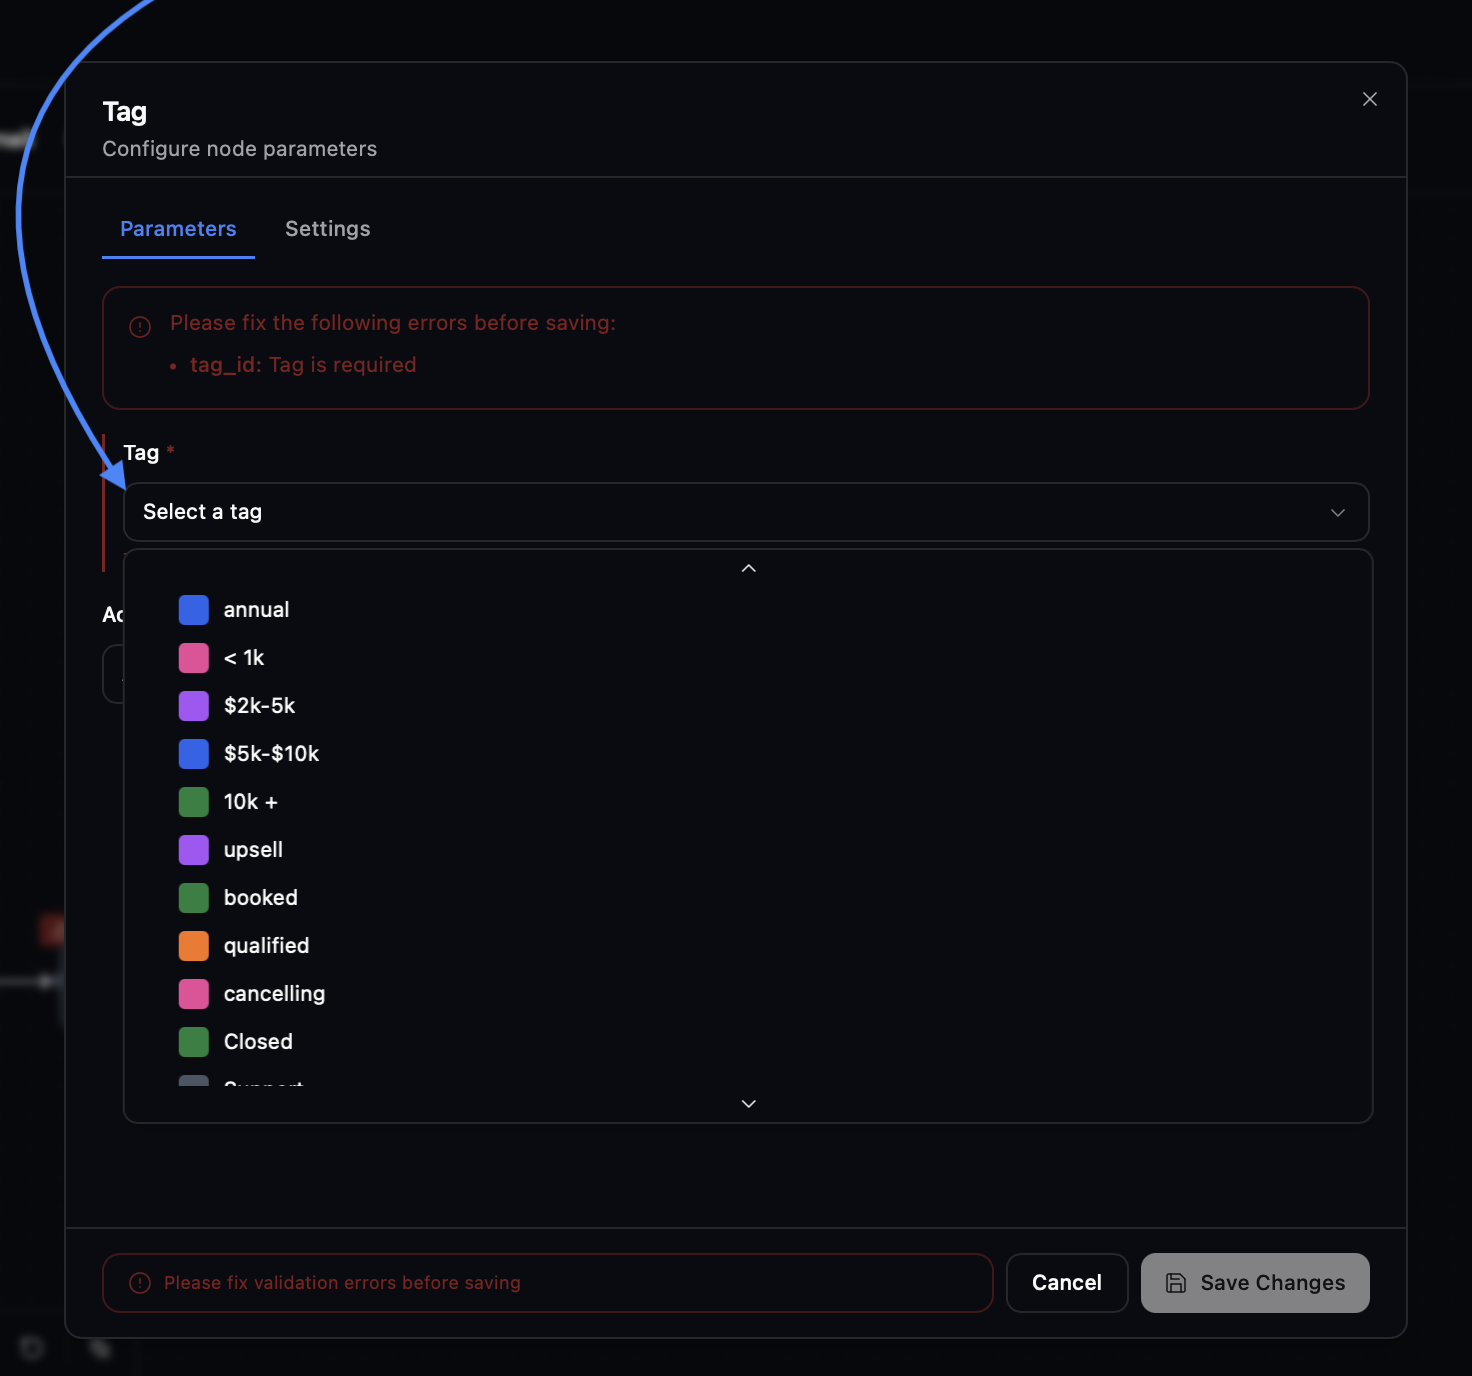
Tag Node
Tag Node
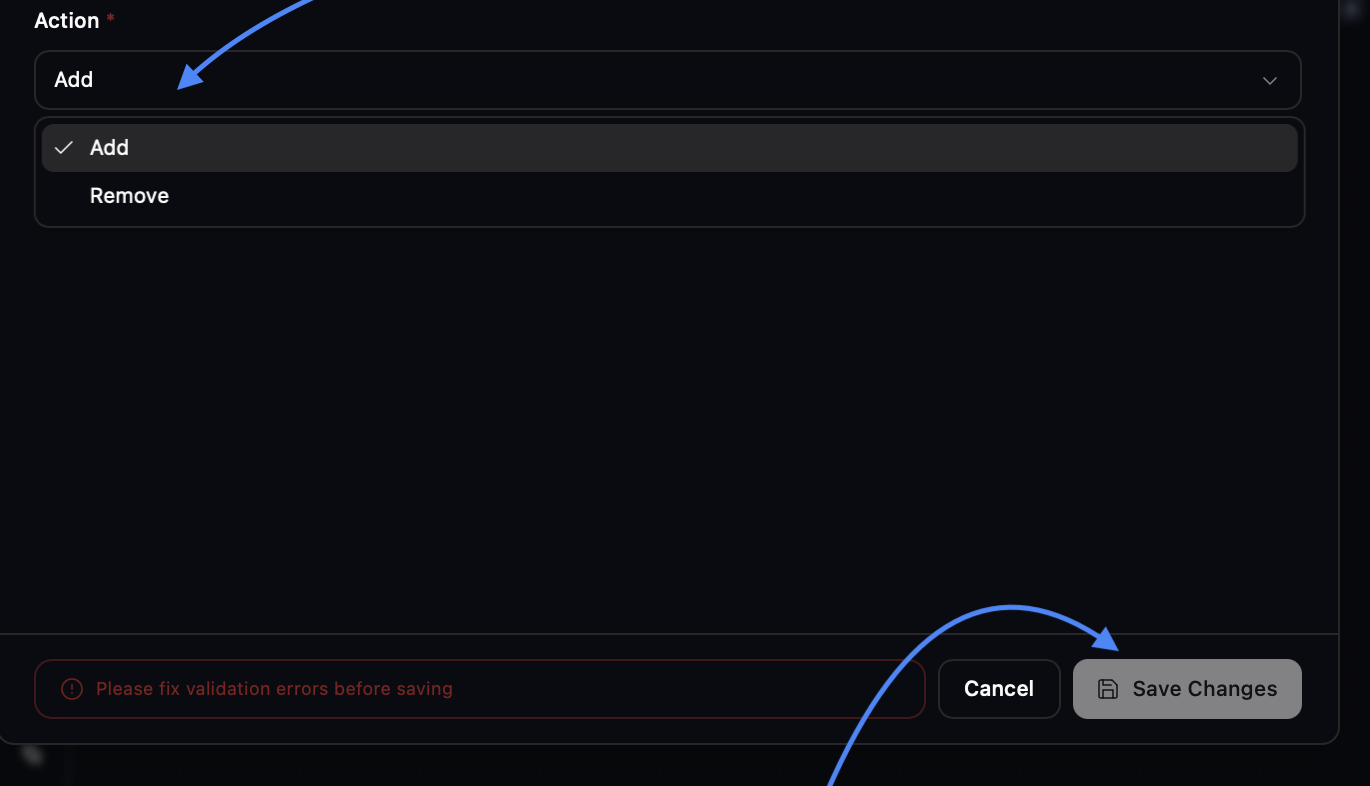
Select the Tag node

Choose the tag you’d like to add or remove to members at this stage of the workflow.
Webhook Node
Webhook Node
Select the Webhook node

Enter the software URL of the software you want to connect and select the data to send.
 Click on the data you want ot send over to other softwares.
These are basic templates to help you begin. You can personalize them at any time and add or remove nodes with the help of the node guide above.
Basic Templates & structure of each automation type:
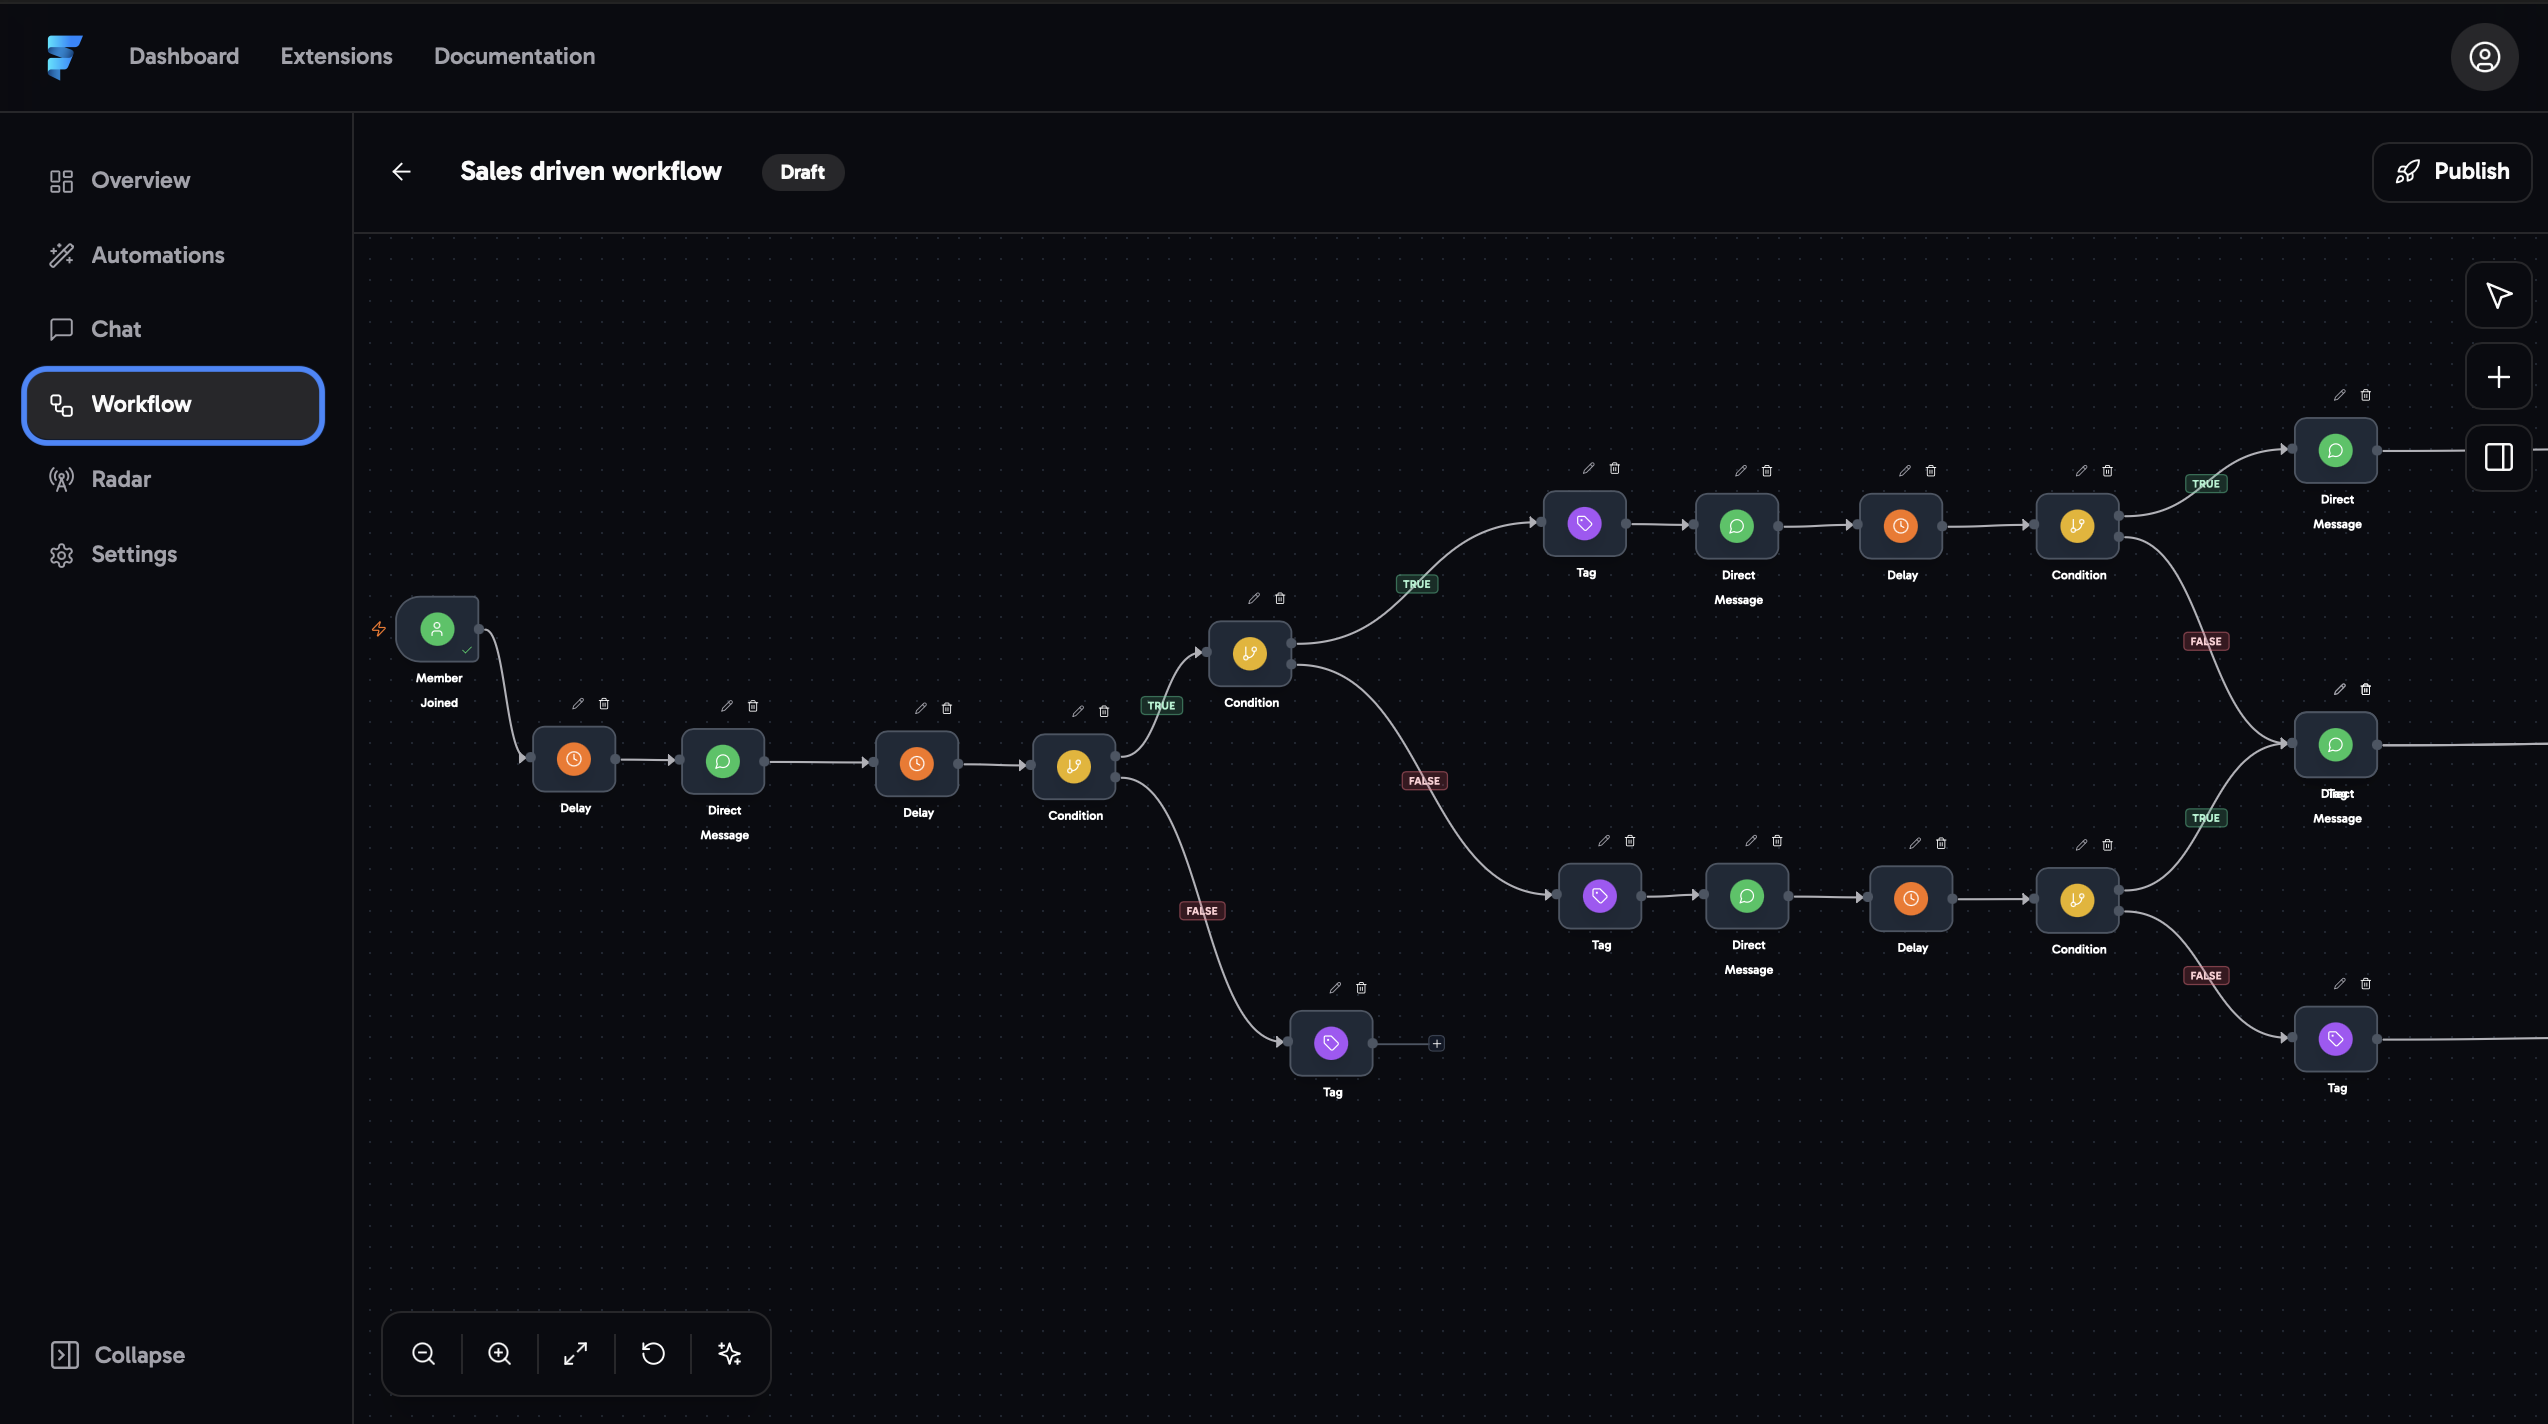
Comment trigger example workflow (CTA post)
Comment trigger example workflow (CTA post)
Member joinened example workflow (onboarding)
Member joinened example workflow (onboarding)
Basic understanding of member joined Triggered workflows
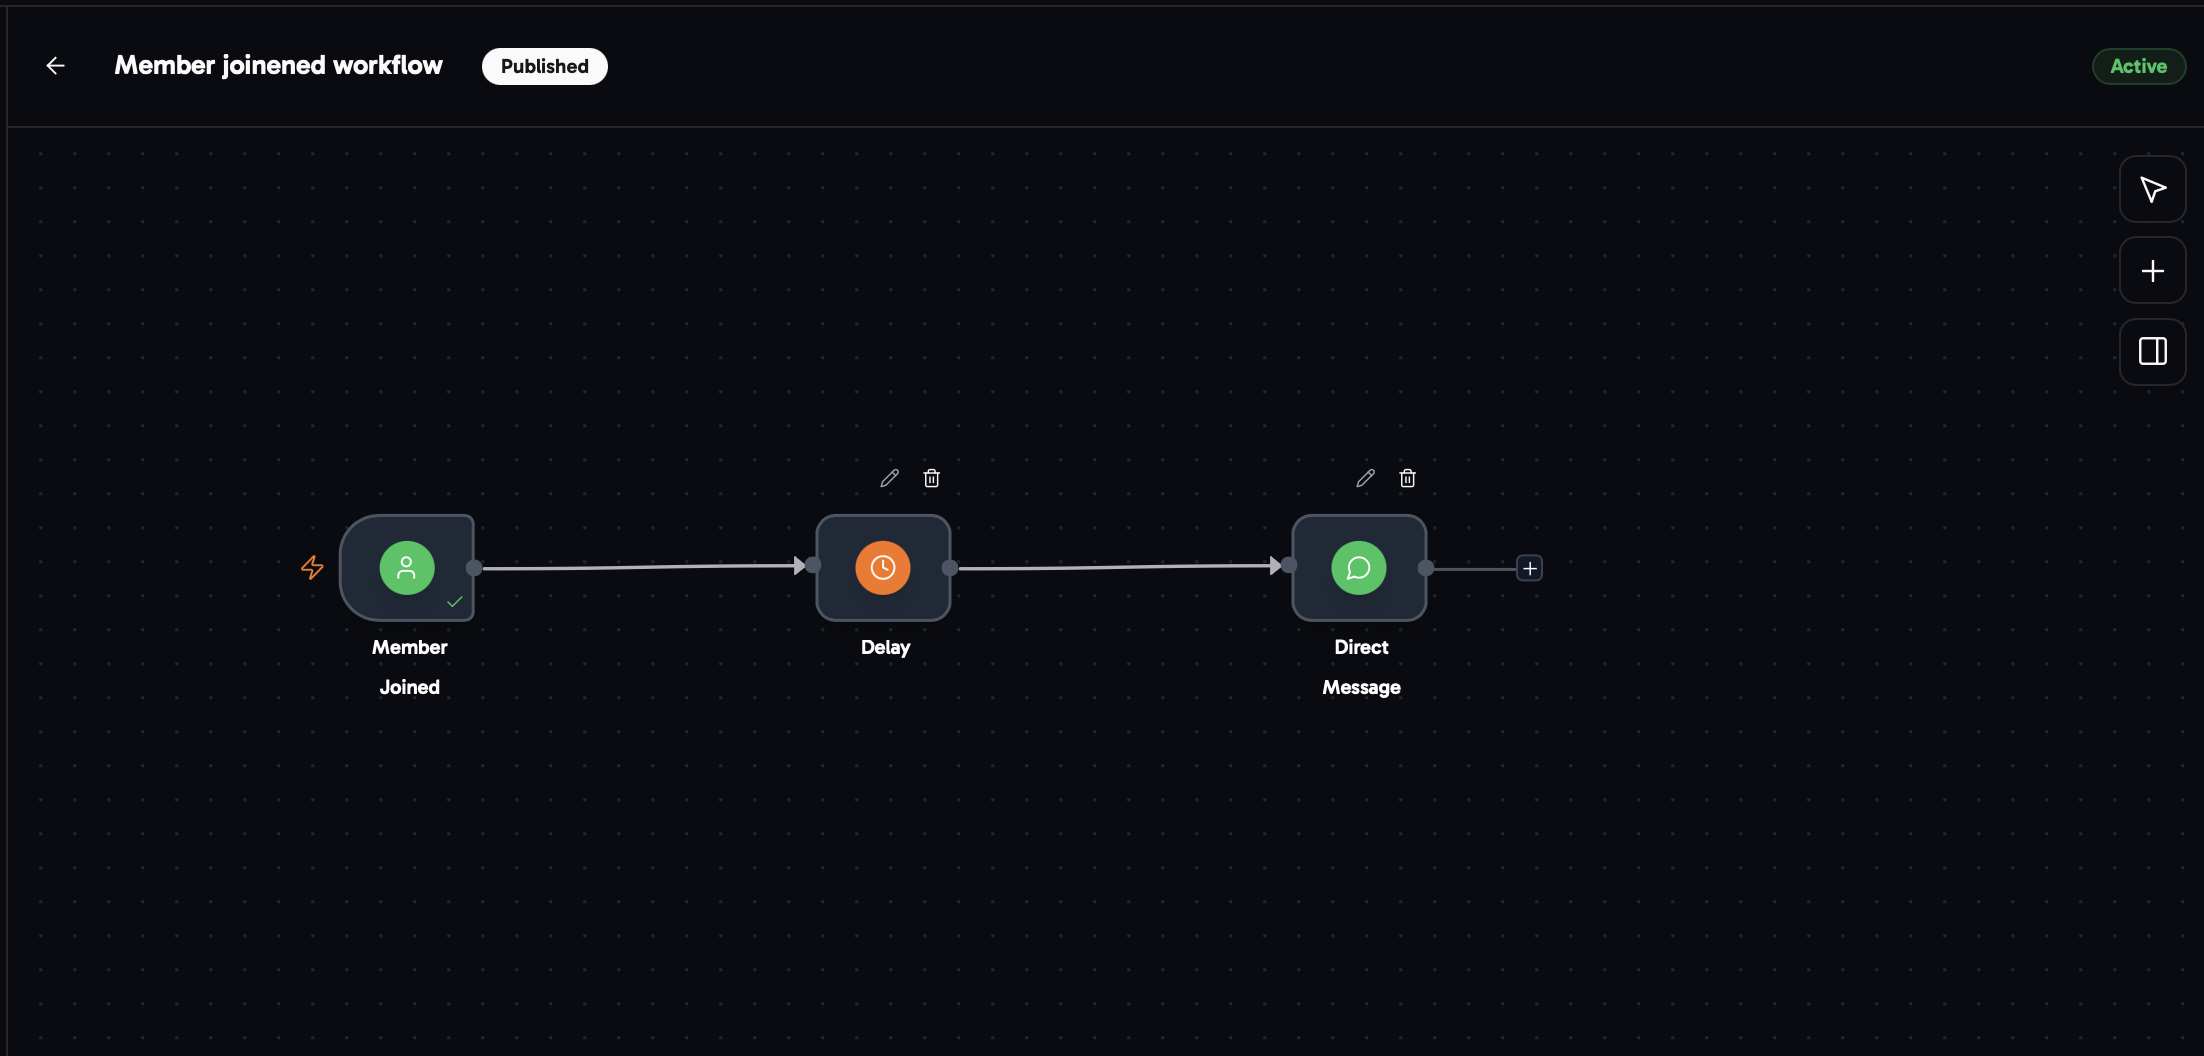
- Coose the member joined trigger when creating a new worflow.
- Next, place a Delay node right after the Member Joined trigger and set the amount of time the workflow should wait before continuing (if you want to wait, otherwise skip to step 3).
- After the delay, or instantly if you prefer, add a direct message that will be sent to all new members who join your community.
-
Done. You’ve now created a very basic member joined automation flow.
To make your workflow more effective and valuable, you can add follow-up chains, check whether members responded or viewed previous messages, and trigger follow-ups accordingly. You can also send webhooks based on specific actions to other softwares (CRM).
For detailed setup instructions, visit the Node Guide where every node and its configuration is explained.
Payment failed example workflow (recovery)
Payment failed example workflow (recovery)
Basic understanding of payment failed joined Triggered workflows

- Coose the Payment failed trigger when creating a new worflow.
- Next, place a Delay node right after the Member Joined trigger and set the amount of time the workflow should wait before continuing (if you want to wait, otherwise skip to step 3).
- Following the delay, or instantly if preferred, set up a direct message and or email to reach members as soon as a card declines and payment doesn’t go through.
-
Done. You’ve now created a very basic Payment failed automation flow.
To make your workflow more effective and valuable, you can add follow-up chains, check whether members responded or viewed previous messages, and trigger follow-ups accordingly. You can also send webhooks based on specific actions to other softwares (CRM).
For detailed setup instructions, visit the Node Guide where every node and its configuration is explained.
Cancellation example workflow (recovery)
Cancellation example workflow (recovery)
Basic understanding of cancellation Triggered workflows
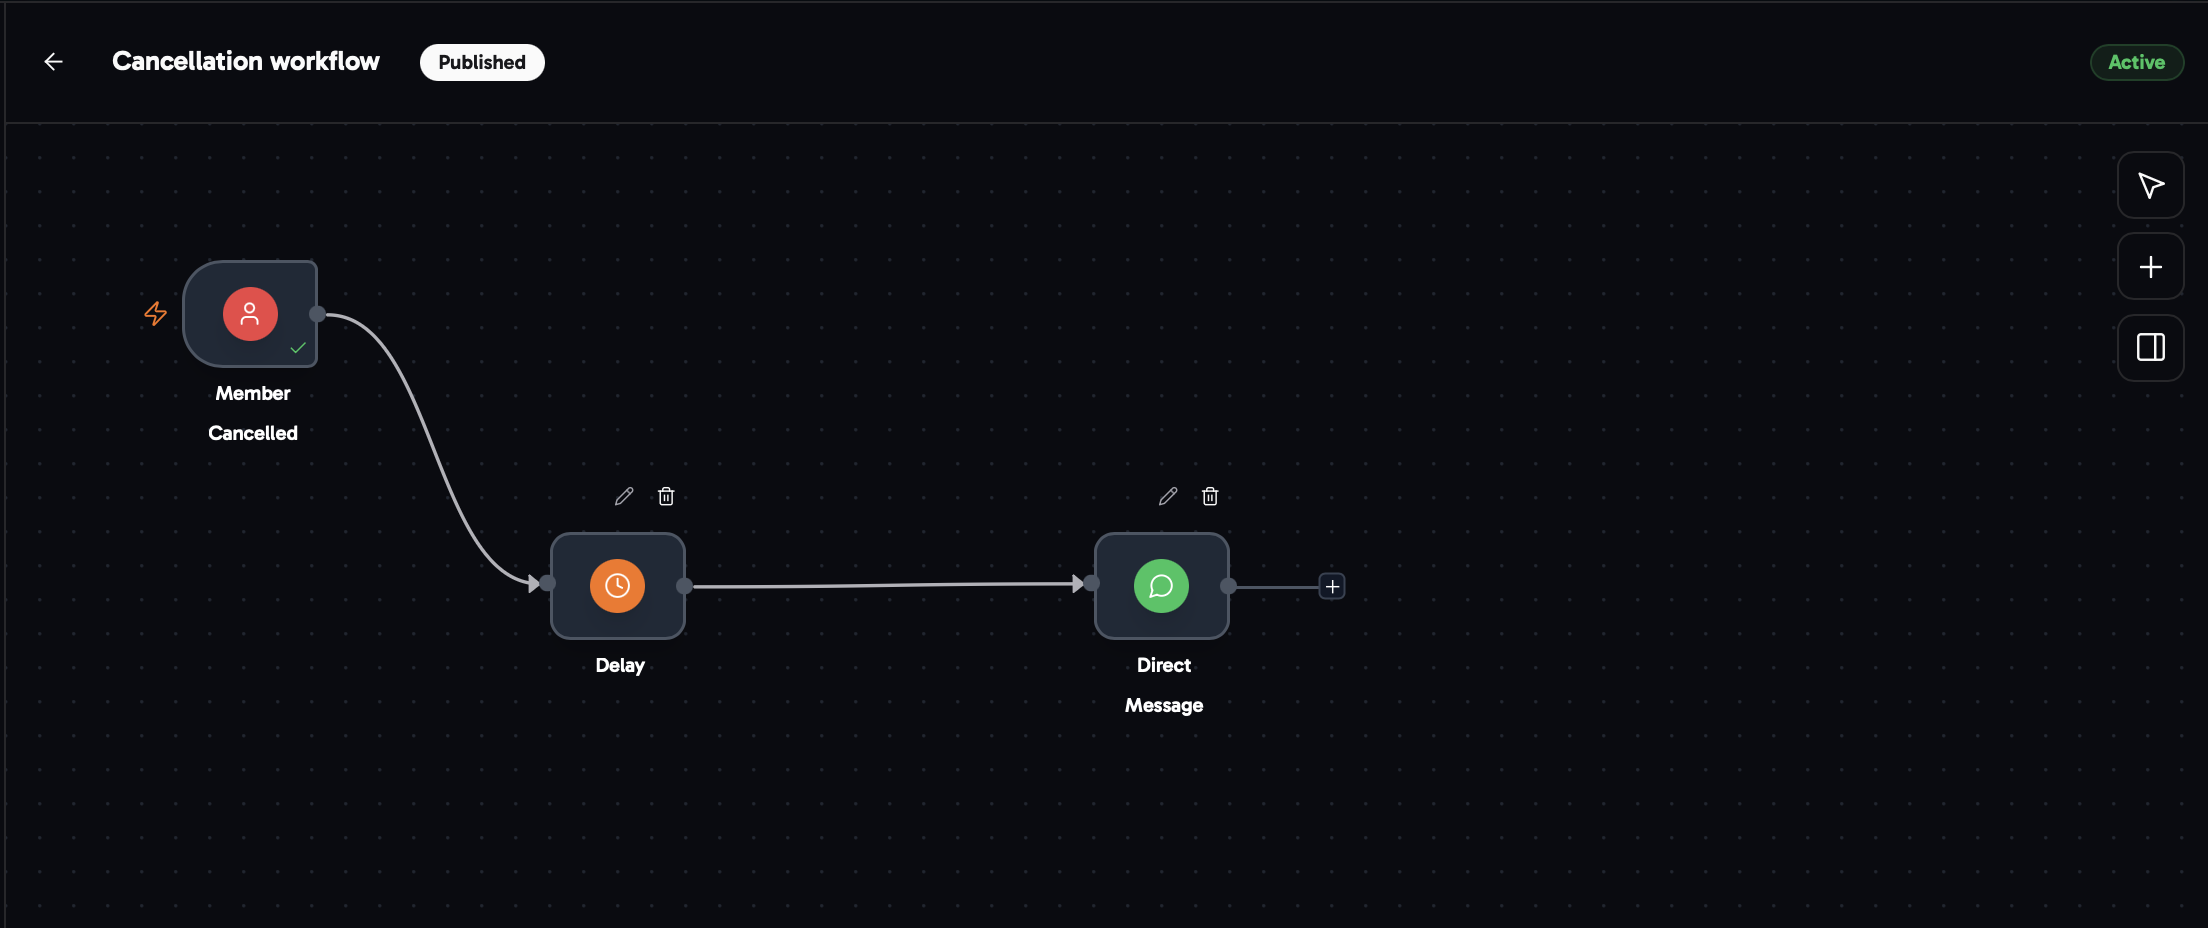
- Coose the Cancellation trigger when creating a new worflow.
- Next, place a Delay node right after the Member Cancellation trigger and set the amount of time the workflow should wait before continuing (if you want to wait, otherwise skip to step 3).
- Following the delay, or instantly if preferred, set up a direct message and/or email to reach members as soon as they cancel their subscription.
-
Done. You’ve now created a very basic Payment failed automation flow.
To make your workflow more effective and valuable, you can add follow-up chains, check whether members responded or viewed previous messages, and trigger follow-ups accordingly. You can also send webhooks based on specific actions to other softwares (CRM).
For detailed setup instructions, visit the Node Guide where every node and its configuration is explained.
Navigation in the workflow system tips and tricks:
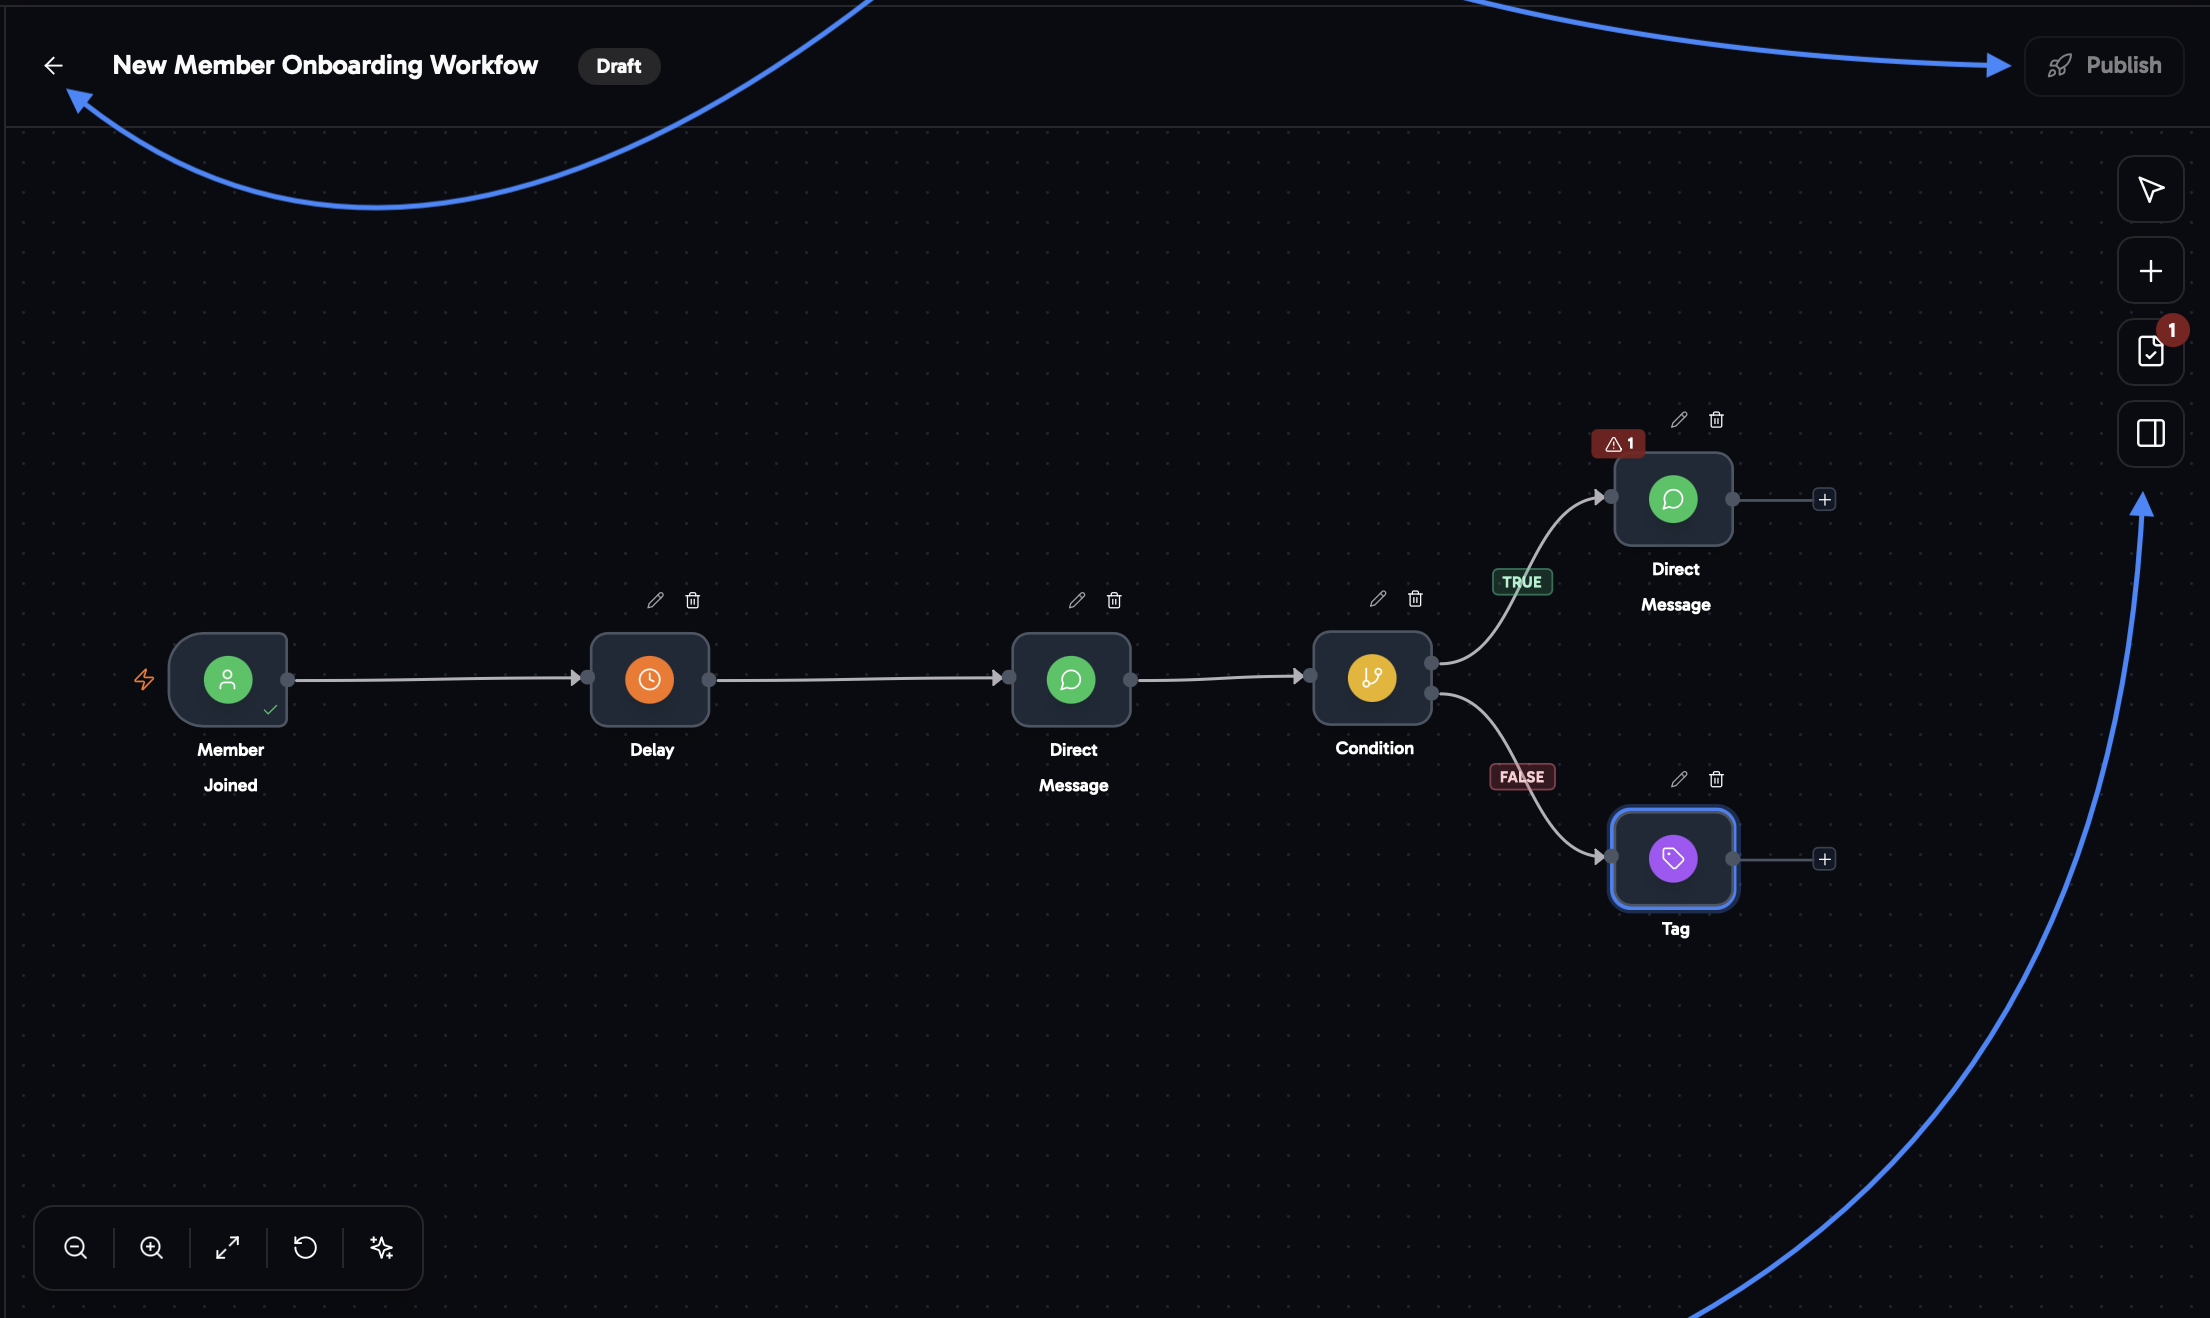
Master Workflow Navigation to Build Automations Faster, Smarter, and More Efficiently
Efficient Navigation
In the top left, you can exit the workflow builder at any time and your progress will be saved automatically, while in the top right, you can publish & activate workflows with one click once ready.The bar on the right side has four different fields and functions:
- Mouse Icon: This is the multi- select-tool. It allows you to select multiple nodes at once by dragging your mouse across them. You can then move, copy, or delete the selected nodes together.
- Plus Icon: This button lets you add new nodes to your workflow. Follow this detailed guide to understand how each node works and how to set it up correctly.
- Overview Panel: This section shows all current issues or errors within the workflow, including explanations and guidance on how to fix them.
- Toggle Icon: This icon allows you to hide or show the right side panel based on your preference and the complexity of your workflow.
Tips and Tricks
Tips & shortcuts
Tips & shortcuts
Shortcuts copy & paste
Tips:
There are many advanced tips for building complex and highly efficient workflows. You can explore our community for a complete playbook on what works and has been tested already by top communities right here.
Manage & control your workflows easily in the workflow dashboard:
The workflow dashboard gives you a clear overview of all active, inactive, and draft workflows.You can track the status & executions of each workflow to stay informed and maintain full control.
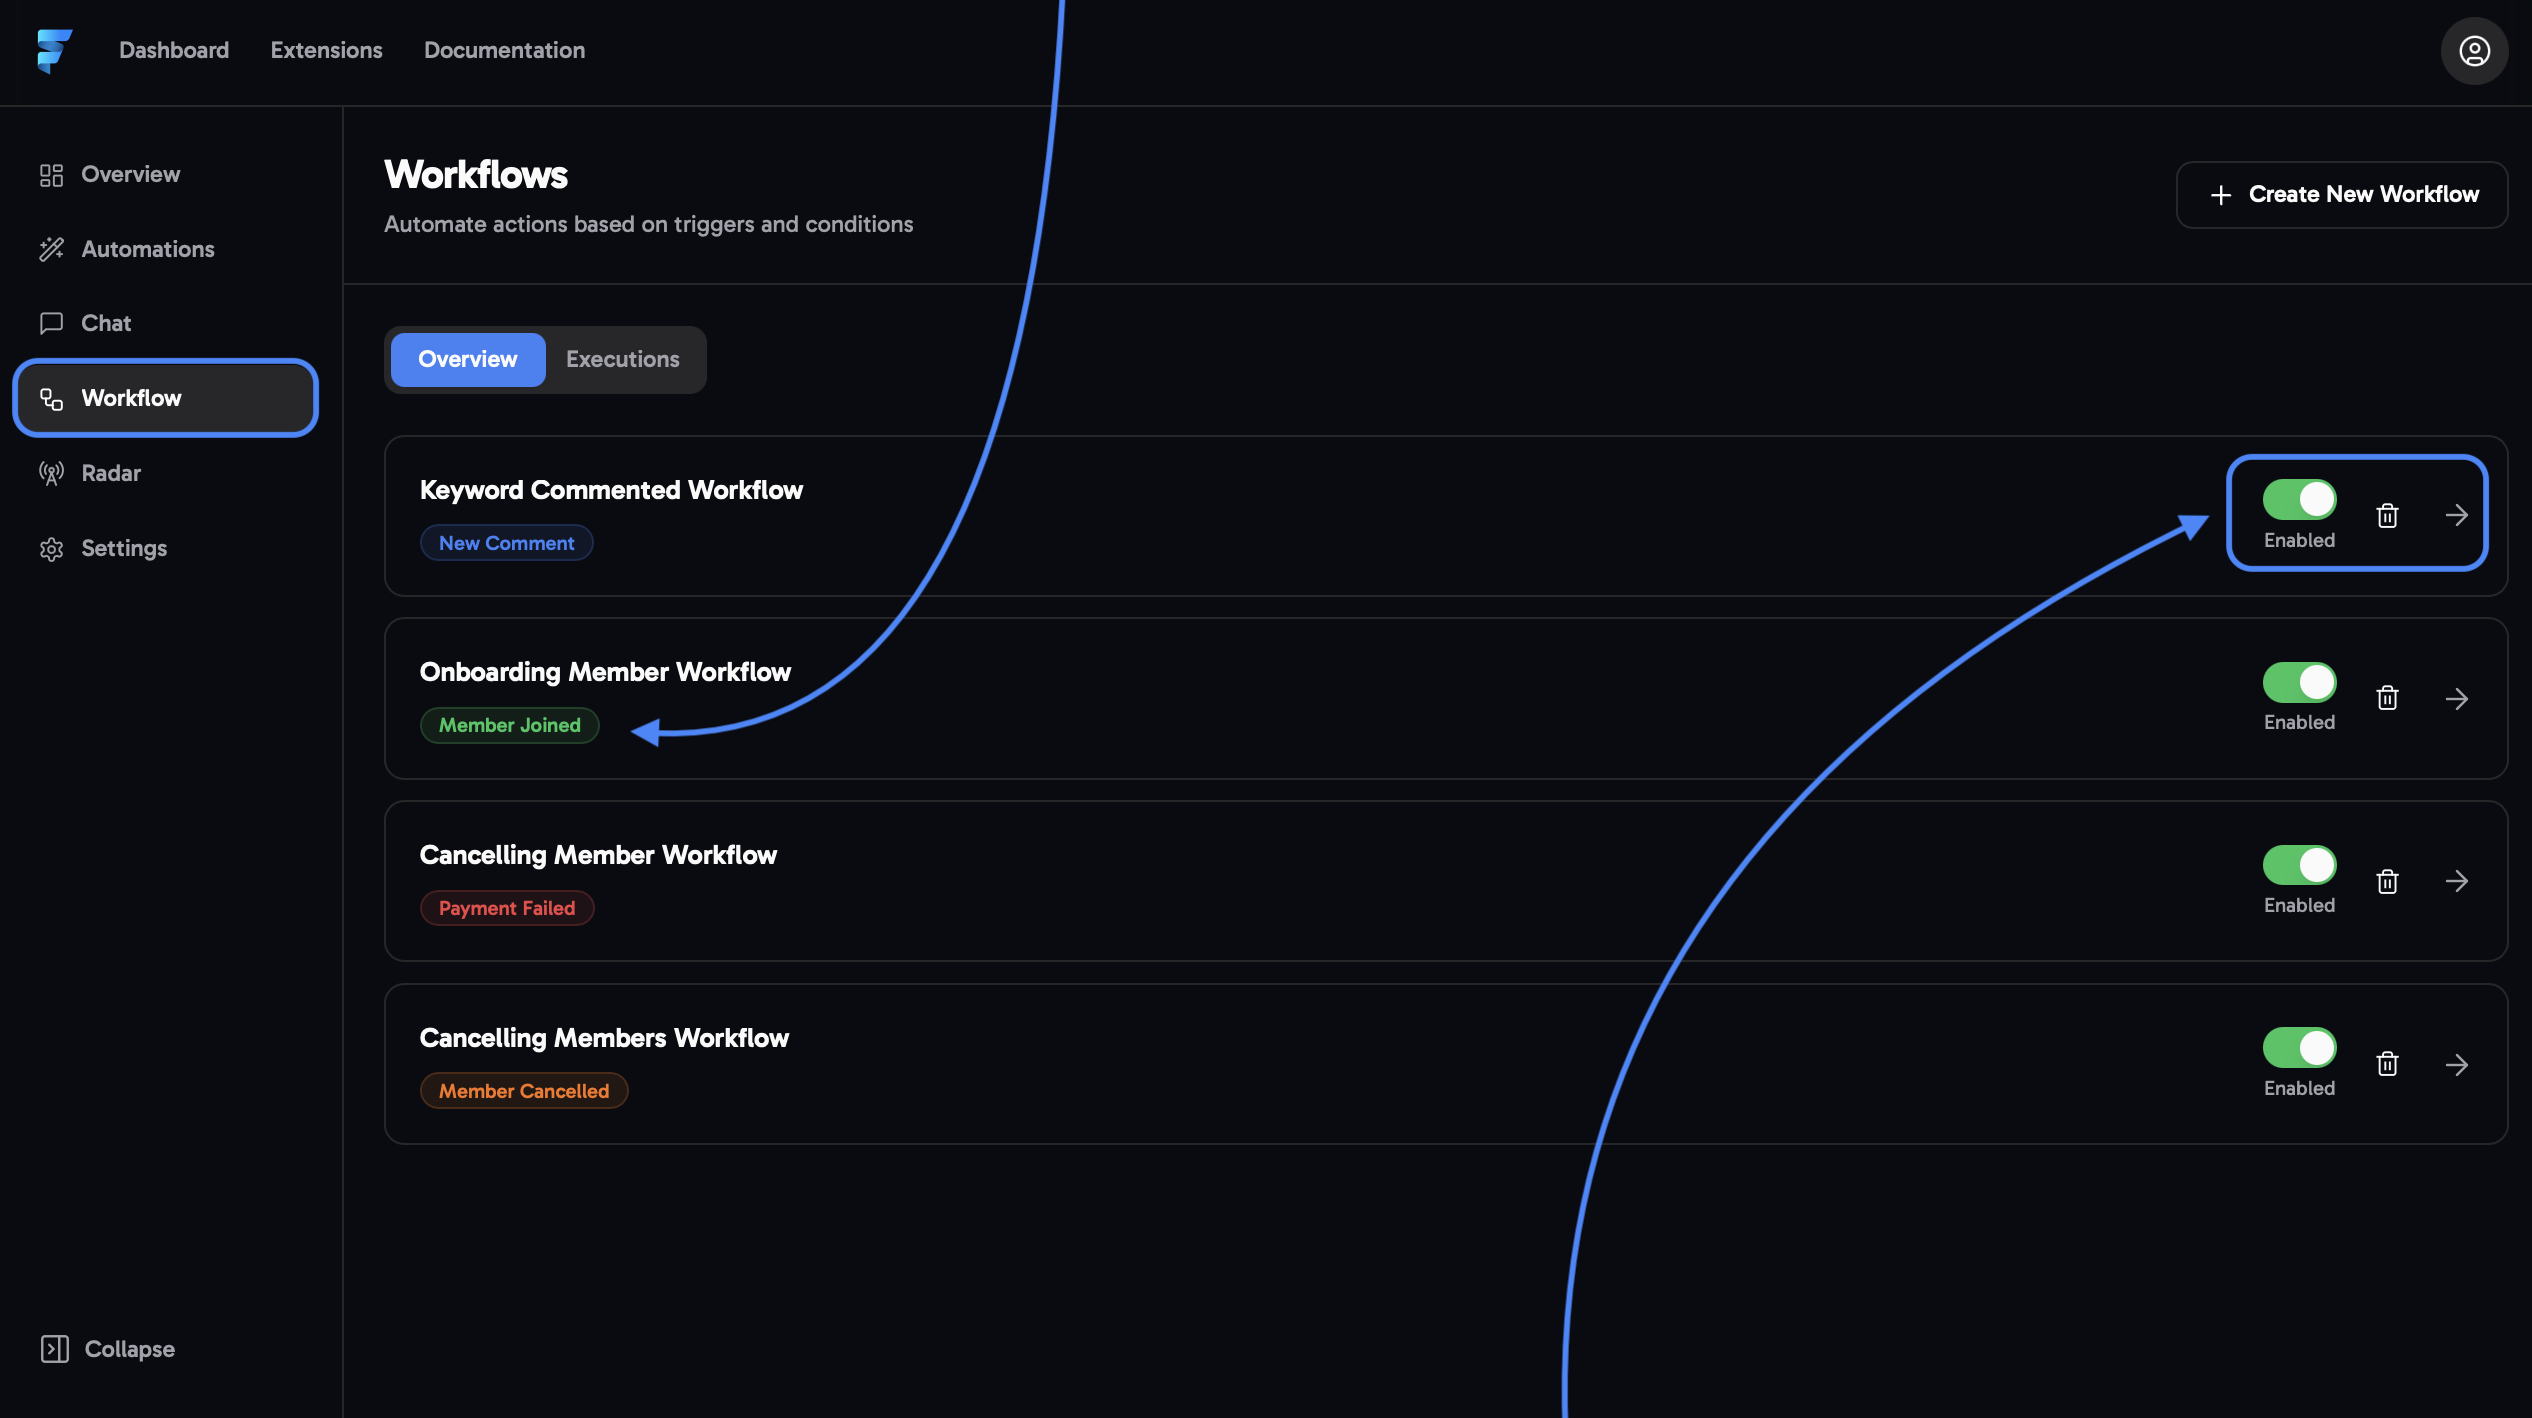
The workflow dashboard is devided into a ‘overwiev page’ and a ‘execution page’Overwiev page
On the left side, you can review the workflow name, description, and trigger type, such as member joined, commented, etc.
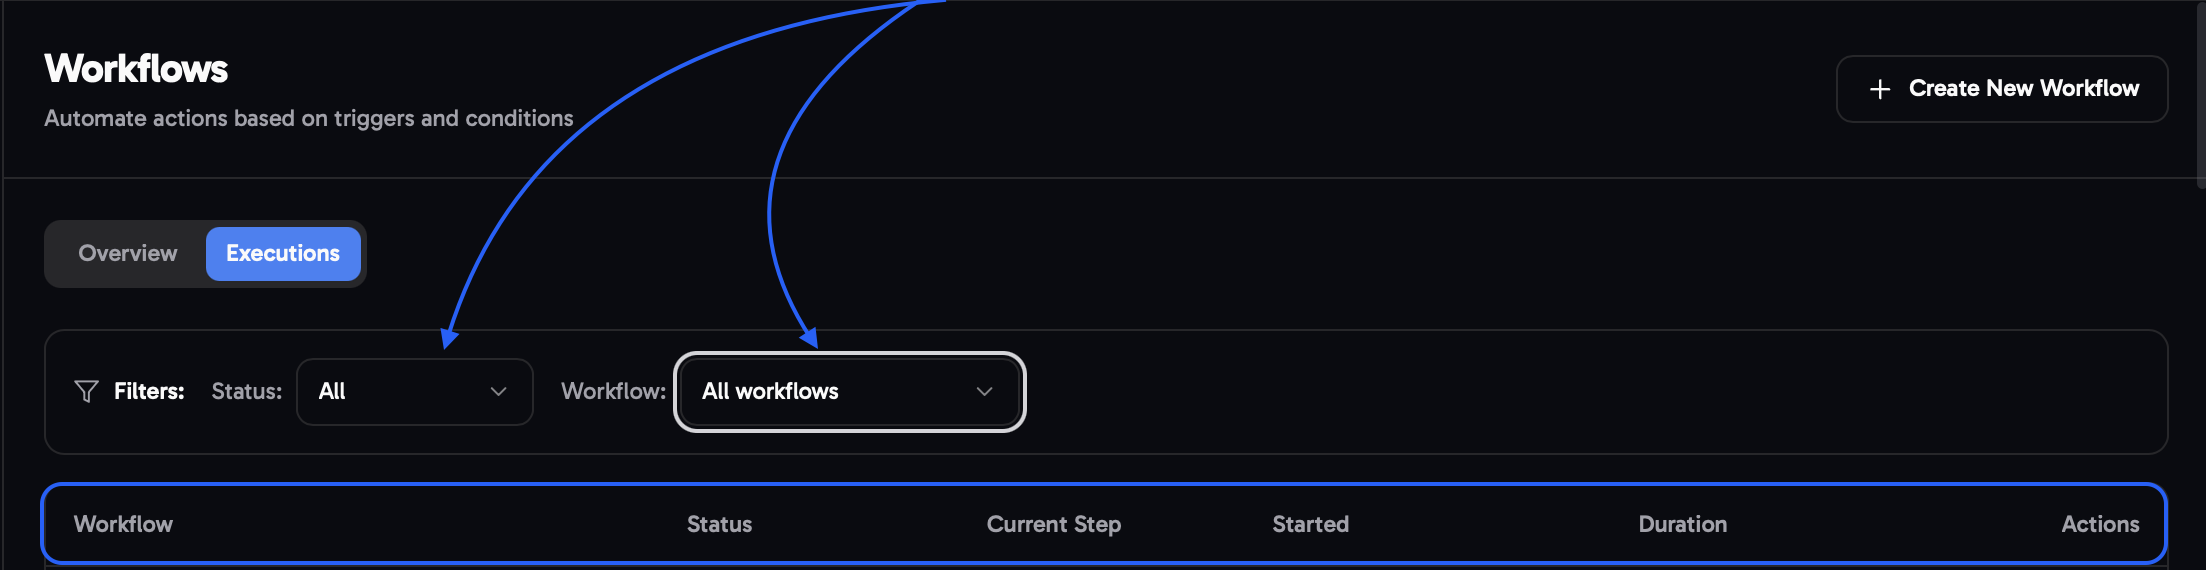
Executions Page
in this page you can simply check for the stage a workflow is in and if it’s running or not.Filter by workflow status or individual workflows to review performance and track behavior.
Basic understanding of comment Triggers workflows
For detailed setup instructions, visit the Node Guide where every node and its configuration is explained.